Why is moulage so important to healthcare simulation?
The art of moulage is applying makeup, prosthetics or simulated blood, for example, to create a visual representation of life-like injuries to enhance the realism of clinical simulation training. Moulage can range from very simple to highly complex depending on the simulation requirements. The use of moulage helps immerse learners more fully during healthcare simulations and increases their level of engagement.

Below, we have a series of videos that will teach you some tips and recipes to create basic moulage.
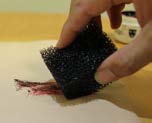
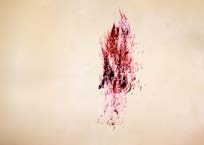
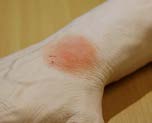
1. Bruises
- Objective: To create a realistic bruise.
- Materials: Kryolan Bruise Wheel, makeup sponge.
- Time: 2 – 5 mins.
Directions

Step 1: Apply a light coat of beige and purple. Begin with lighter colours first, followed by the darker purples.
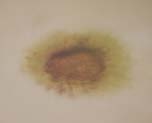
Step 2: Use a dabbing motion with a makeup sponge. blend each colour separately, pulling the colour from the middle to the outside.
Use caution with the purples. A little really goes a long way.
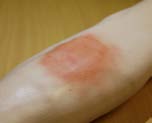
2. Grazes
- Objective: To create a realistic abrasion.
- Materials: Fresh Scratch, Fresh Scratch mesh applicator, stones/dirt if required.
- Time: 2 – 5 mins.
Directions
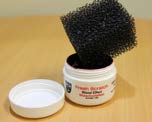
Step 1: Insert the corner of the stipple into the Fresh Scratch.
Step 2: Drag it across the area where the abrasion is going.
Step 3: Add small amounts of stone or dirt to wet Fresh Scratch, if desired for a gravel rash look. Allow to dry.
Tip: A bruise underneath the abrasion may assist with realism.
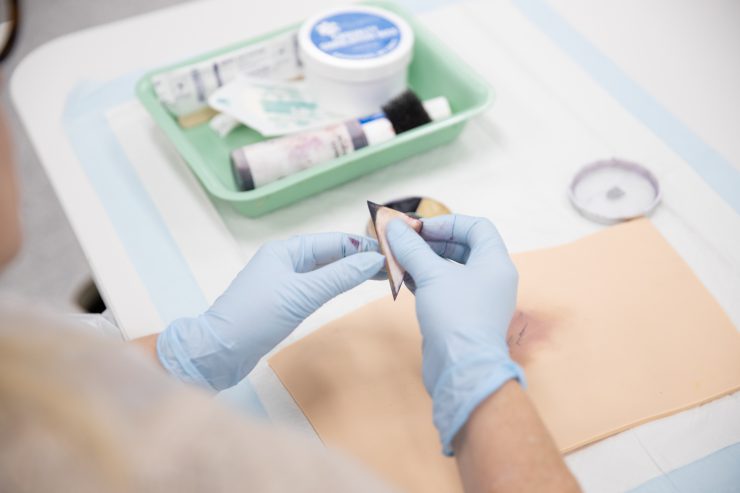
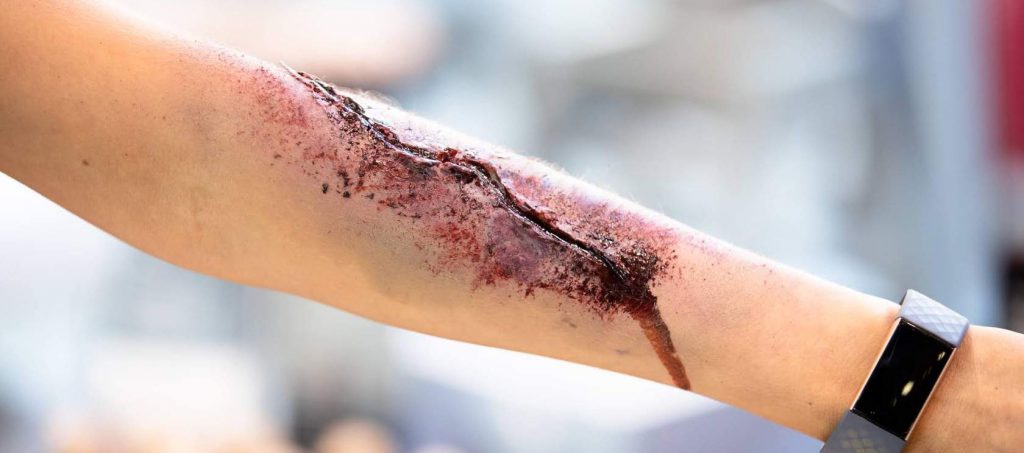
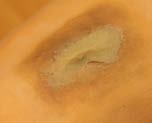
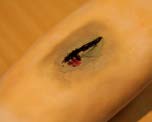
3. Laceration
- Objective: To create a realistic laceration using simulation wax.
- Materials: Simulation wax, tongue depressor or similar, Kryolan Bruise Wheel, Fresh Scratch, makeup sponge, simulated blood.
- Time: 5 – 10 mins.
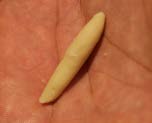
Step 1: Create a bruise where laceration will be. Using casualty simulation wax, work it in your hands to soften and make a snake.
Step 2: Create a ridge and smooth edges so they blend with the skin. Cover the wax with skin-toned makeup/ bruising colour.
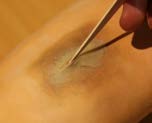
Step 3: Using a tongue depressor, blunt needle or ice cream stick, cut a slit into the wax to represent the cut required.
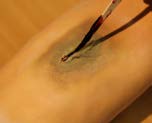
Step 4: Apply Fresh Scratch into laceration with either a blunt needle or tongue depressor.
Step 5: Apply more bruise colouring around the wound if required.
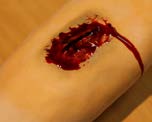
Step 6: Complete the effect by applying blood, allowing some to drip down the skin.
Tip: Creating a bruise before applying the laceration can help with blending. To make the wound appear deep, apply some black Fresh Scratch into the bottom of the laceration.
4. Burns – First and Second degree
- Objective: To create a realistic first and second degree burns.
- Materials: Kryolan Bruise Wheel, makeup sponge, Tegaderm dressing, KY Jelly.
- Time: 5 mins.
First degree
Step 1: Apply a thin layer of red makeup to redden the burnt skin area.
Second degree
Step 2: Redden the burnt skin area as above. Make the burn area larger than the tegaderm.
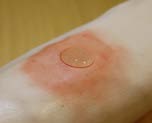
Step 3: Apply a blob of KY Jelly the size of a 20 cent coin.
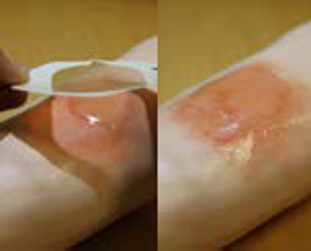
Step 4: Affix a tegaderm dressing over the KY Jelly making sure no air bubbles are under the tegaderm.
Tip: For a fire burn, sprinkle a small amount of charcoal powder around the edges before applying the tegaderm and KY Jelly.
Create a peeling burn by piercing the tegaderm.
Related links: